Pages

Sunday, May 22, 2016

Dice, Dice, Baby!


My sons own and operate a store in Joplin, Missouri, called Hurley's Heroes Comics and Games.
I have wanted to create logo hats or other items for the kids. They don't want hats or scarves, so I decided a good test would be a dice bag. Nathan told me a dice bag should be of a dimension that would enable a player to put a few magic cards in with the dice without bending them when the bag is cinched shut.


I downloaded a copy of the store logo and inserted it into an Excel spreadsheet. I got a template for making a spreadsheet with cells slightly wider than they are tall, just like knitting stitches are, but I can't find the source right now. It's not terribly important.

I made the picture of the logo mostly transparent and colored the cells beneath to match. I was only interested in the large Superman-shield portion, and I got that directly from one of the kids.

In order to get enough detail to make the logo fairly clear in a small space, I had to use tiny stitches. I settled on size 2 needles and DK weight yarn.

The picture below shows the intarsia knitting of the logo, along with the chart and the selected yarn. What a chore! Every time the color changed, I needed a new bobbin of yarn. The rows with the crossbars of the Hs took nine. If I do it again, I will probably carry some colors over and let them float. The logo covers 28 stitches and 28 rows.


So I had my sample test logo. I put little eyelets along the top so a cord could be inserted later. Intarsia has to be knit flat, and if I was going to complete a bag with this one, I would have knitted a back to attach to this front.


There wasn't enough room to dedicate stitches to the black borders around the logo elements, so I embroidered them in using only half of the plies in some leftover yarn from Jason's afghan.


I think the black is a little bit jagged. I consulted with Jason, and he thought the black was a good addition.

I thought it might be easier to just knit the bag as a whole in the round, like  a sock or a hat and duplicate stitch the red and yellow on top of it instead of doing the intarsia. I cast on 64 stitches, leaving the front 32 stitches wide. This allows two stitches on either side of the 28-stitch logo.

The top four rows are garter stitch. Then there is a row of eyelets created by yarning over and knitting two stitches together, followed by another four rows of garter. Then it's all stockinette to the bottom. I put all 64 stitches onto scrap yarn so I could graft them together with kitchener stitch after I got the logo added.

I learned I can't duplicate stitch on such a small area. The messy intarsia was actually much easier. If I were going to duplicate stitch on something larger someday, I would have to remember to add lifeline guides as I knit along, instead of trying to sew them in later.

I wanted to get the bag finished, so I took my intarsia patch, frogged it back to remove the stockinette section above the garter stitch at the top of the logo, and bound it off. Then I sewed it onto the front of the bag and grafted the "toe" shut.

Here is my first finished prototype bag. I made the cord by just crochet chaining a length of the blue using a size F hook and knotting the ends. It is threaded through the eyelets and has enough length for a bow when cinched. It isn't really crooked. I just have it laid out askew in this picture.


It is too long. I don't really need any of the stockinette that is below the garter stitch at the bottom of the patch. This is more like a large-screen cell phone sack. I do like the way all the ugly ends of the intarsia knitting are hidden between the patch and the bag. Maybe the patch could be a pocket for the gamer to stick a key in, or something, if the top is left open.

I think I need a little more height above the eyelet rows, so it will have a nice bit sticking above the cord when it is cinched closed.

If I make a bag with a patch attached to it, I could use larger needles for the bag. It just needs to be tight enough to have some density and cover the contents. That would go much faster. I can make logo patches to attach to anything: Hats, scarves, socks, taablet computer sleeves, whatever. Now that I know what I'm doing, I can make better patches and make them faster.

The Two-year Log Cabin Blanket Project

When I started knitting, one of Jason's friends told him he'd probably wind up with an afghan someday. I took it as a challenge. I'm bookending this post with the finished item, because I don't know how to control which picture will be featured when I link it in a facebook post.


I asked Jason what sort of afghan he might like, and he said it should have bright colors and geometric shapes. Well all right, then! I had been wanting to use the Very Pink Knits tutorial and pattern for a log cabin blanket. http://verypink.com/2012/02/15/log-cabin-scrap-blanket/

Staci Perry walks you through the construction of this easy project. The only reason it took two years was because I would get the blocks to a certain point, tire of it, and work on something else for a while.

I wanted to match an Ikea rug that Jason has in his living room. In the photo below, you can see there are seven colors: Bright red, sort of an antique red, orange, gold, green, dark and light gray.


Because the rug has seven colors and I wanted nine for each block, I added two more green shades. Jason has a teal and an orange parsons table in the room, so I wanted to include the teal. I bought Caron Simply Soft, an acrylic yarn that is pretty soft and comes in a wide variety of colors.

The colors are pretty well represented in the picture below. This was taken after completing the first step in each block, making a garter stitch square of 20 stitches by 40 rows. The very last stitch is not bound off, but has a safety pin stuck through it. Each time you begin a new color, you create a strip by picking up and knitting along the next side of whatever part of the block has been completed. So the first strip goes like this: stick the needle through the remaining stitch of the old color. Rotate the piece clockwise a quarter turn. Pick up and knit 20 stitches along the side, one stitch for every two rows. Knit the 20 stitches back, and on the last one, knit it together with the extra leftover stitch from the prior color. Continue knitting the 20 stitches of the new color for 20 rows and bind off all but the last stitch.


Here I have added the first strip as described above. I have also done the second strip, which requires 30 stitches: 10 picked up in the 20 rows of strip one, plus 20 picked up along the cast on edge of the initial square.


The picture below is of a completed block. It was built like this: Green square, light gray strip one, teal strip two, orange strip three, blue-green strip four, dark gray strip five, bright red strip six, gold strip seven, and antique red strip eight. (The rotation described would be counter-clockwise, but the block is upside-down.) It is pinned down to be steamed into a nice even square before adding borders and assembling.

Strip eight has 60 stitches in it. Each strip is 20 rows wide, and when you are picking up along the rows, you pick up one stitch for each two rows. So the 60 stitches in strip eight are picked up in this order: 10 along the rows of gold strip seven, 40 along the bound-off edge of blue-green strip four, 10 along the rows of dark gray strip five.

Notice on the back side how each color change causes a dashed line inside the prior color. Each block and strip creates two yarn ends that require hiding and securing. At the color changes, they are knotted together, and then the ends are buried. At first I was just going over and over the seam, but later I watched another Staci Perry video and learned how to weave them into the purl bumps on the back side in a barely-noticeable way.


I laid all the completed blocks out to form a blanket three blocks wide by four blocks long. When I picked the colors for each block, I just assigned them by "promoting" them in the same order, rotating through nine of the blocks. For the last three, I just winged it, making sure none of the blocks had the same arrangement as the first one I made with the same center color. The repeated center colors are bright red, gold, and orange.

So, if I assembled them in the order I made them, there would be a clear pattern in the first nine blocks that would show the rotation. I mixed them up with no square repeated in a row or column, and no color adjoining itself in a neighboring block. There are a few places where I have some colors too close, either butting up or catty-corner, but overall, it's OK. Anything that is too close ended up separated by the black border. 


Knowing the arrangement before adding the borders is important. The edge of a block that is on the outside will have a 20-row black border. Inside edges have 10-row black borders. Border pieces are strips made exactly like all of the others, except after adding the first border strip, you no longer have to deal with color changes.

The completed, bordered blocks are assembled by sewing them together using mattress stitch. There are ways to crochet blocks together, but that would require being sure to have all of the crochet stitches pointing in consistent directions and putting them in the knitting stitch-for-stitch. I didn't want to mess with that. My sewn seams aren't as nice as I would like, but the black yarn makes them less noticeable. Jason likes it.


Ballerina Sweater and Leg Warmers

I bought this beautiful Manos Del Uruguay yarn on sale at Stitch Space, LLC in Webb City.  Blue is Elsa's very favorite color, and her leotard and tutu are pastel blue. Because it is cropped, she can probably wear it for a few years. For now, Elsa has taken a break from dance classes, because she wants her mom to stay with her through the entire class. She may or may not take it up again. No matter. She can wear it with clothes, too.

Before committing this soft merino wool to the project, I made a couple of little loop bracelets for Kasia and Elsa to wear, to make sure the wool wouldn't irritate anybody's skin, and it doesn't! This opens up a whole new world of yarns for things I will make for them.

The pattern was purchased on Ravelry. It's the Madeleine. Here is the link: http://www.ravelry.com/patterns/library/one-button-cropped-sweater-the-madeleine

It was really, really easy. You start at the neckline, do a series of increases to create the raglan sleeves at armpit width, and knit down to the bottom and work some decreases to create the open front. Then you pick up stitches and create the short sleeves. Then you finally pick up stitches beginning at the center bottom, up through the front, around the neckline, and back down to the other front to your starting space at the center back. You join it in the round and knit a certain number of rows of garter stitch to create the wide, stabilizing border.

I had enough left for leg warmers. There was a pattern available on Ravelry for super-bulky leg warmers, but they were knit flat and seamed. I just knit some tubes with ribbing at the top and bottom and used an apple to stand in for Elsa's leg circumference.
I still have some left over to make a hat or something. I also have two different shades of pastel blue eyelash yarn I'd like to incorporate.

Thursday, February 18, 2016

Another Soho Turban

Hey, folks. I didn't much care for the off-white one. It needs more substantial yarn. I found this Tahki Montana on sale at Yarn Shop and More, and I picked it up off a clearance shelf for $10.00.

It's heavier than the other yarn I had used, but it could stand some more thickness.  The yarn from the designer is three times heavier. It's also $30.00 plus shipping, so I'm happy with this one for now.

G'night!

Wednesday, February 3, 2016

Some hats for moi

I wanted to get a couple of hats ready to wear for the remainder of the winter. I'd really like to become a hat lady, but my workplace won't allow anything that looks like it might be a stocking cap to be worn inside.

So, here they are:


This turban is made from a free pattern available on Ravelry from The Third Piece company called The Soho - Turban Hat http://www.ravelry.com/patterns/library/the-soho---turban-hat. The recommended yarn is their Funky Chunky, a super bulky yarn http://the3rdpiece.com/. It's $30 for about 70 yards. I used a different yarn, also a super bulky, named Mirasol Ushya that I bought at Florilegium in Weston. It's mostly merino, with some nylon added. It's not as bulky as the Funky Chunky, but the price was reasonable, and I wasn't sure if I could make it. Now that I am, I will probably buy some Funky Chunky, or maybe some Cascade Yarns Magnum for the next one. I could also adjust the width of the turban band for other yarn weights, now that I understand the construction. I credit this lady, who made the hat and described it on her blog: http://ggmadeit.com/blog/the-tale-of-the-turban/


This cloche is from another free Ravelry pattern, The Lady Lorri Hat by Madelena Cascio, http://www.ravelry.com/patterns/library/lady-lorri-hat-2 It is also a super bulky yarn, and I made it in cream for my mother-in-law and in black for myself. The yarn I used was Bernat Blanket.

The black cowl doesn't show up well in the picture. It's the Wham Bam Thank You Lamb! from Susan Chang. http://www.ravelry.com/projects/hbananas/wham-bam-thank-you-lamb-neckwarmer. It is knit as a band about 12-14" wide, measured to fit the wearer's neck, then seamed into a circle, but instead of making the ends flush, they are offset a few inches on each side. Here's her picture from the pattern.
 
 
Mine's a little snug, and it tends to push the back of the hat forward onto my head. I will try wearing it backwards, with the skinny part under the hat. I have enough of the black blanket yarn to try a different cowl, too.
 
I also made myself a rolled brim ordinary stocking cap using Patons Classic Wool Bulky, using the same pattern as for Kasia's and Elsa's hats. It's just plain brown and not worth a picture. It's a tiny bit short, too, so I'm not sharing. My blog, my choice! Stay warm out there, folks.
 
Holly Nan

Sunday, December 13, 2015

Prayer Shawls, Pocket Cloths, and Experiments

When I took up knitting last year, I started looking for a way to do it socially and charitably. The Lion Brand website maintains a list, and it turned out that there is a prayer shawl group that meets the second Saturday of each month at Living Water Christian Church (Disciples of Christ) in Parkville. I joined the group in December 2014. The pastor, Laura Guy, is a member of the group, and I really like her, so I started attending the church. That was another thing that had been missing from my life.

Lion's website address is www.lionbrand.com
Here is the church's website address www.livingwaterchristian.org

Lion has a lot of free prayer shawl patterns on their site, and I've used the basic pattern twice. Buy three skeins of Homespun, cast on 63 stitches, and in every row knit 3, purl 3, to the end, until you run out of yarn. You end up with something like seed stitch, only with fewer changes between knitting and purling. The threes are to give a nod to the holy trinity. This is the first one I made. You may have to create a free Lion Brand account to view the actual pattern. http://www.lionbrand.com/patterns/81040AD.html?noImages=0

I have also made one using the Cashews pattern from Alice's Embrace, an organization that donates to Alzheimer's patients. http://www.alicesembrace.com/patterns/#/cashews/


This summer, one of the group's members attended the big meeting of the Disciples church and came back with the suggestion we make pocket cloths or shawls in addition to the larger ones. They're portable, they're a ton faster to make, and they can use up small amounts of yarn that are left over from other things. We've been making them with nice soft blanket yarn and jokingly referring to them as "woobies" because they exist for comfort and are fun to feel.

I used patterns from a combination of the following sources:
http://www.oslclaurel.org/ministry/prayer_shawl/prayer_cloths_cross.pdf and
http://holston.org/media/about/resource/2015-pocketprayershawlinfo.pdf

Here are pictures of ones I made using these patterns.

Cross
 
Fish Cloth per the patterns

The next three pictures should be rotated 90 degrees counterclockwise. Until I get that fixed, please tilt your head to the right when viewing them.
 
 Descending Dove
 
Angel
 
Awareness Ribbon (in this case, Leukemia color.)
 
 
Customized two-color cross in University of Missouri colors for a friend to give to her son.

 
This is a washcloth pattern from Ravelry. I tried making it smaller by knitting it with finer yarn and smaller needles, but it's still a little too large for a pocket cloth in my opinion. I'd feel funny washing dishes with it, too. http://www.ravelry.com/patterns/library/3-crosses-cloth

This is another washcloth pattern available on Ravelry. I used an ombre yarn with blues and greens to make it, since we are Living Water. http://www.ravelry.com/patterns/library/wave-pool-cloth


The fish pattern above looks more like a shield to me. Instead, I experimented with the traditional Christian fish symbol and made up my own chart. Here's mine. I doubled the yarn when I did the duplicate stitch of the cross, and next time I will just use a single strand. I shared it on Ravelry as a free pattern. http://www.ravelry.com/patterns/library/christian-fish-prayer-cloth

My Christian Fish

Same story with the dove. It looked more like an arrow to me, so I am experimenting with one modeled after the Dove Soap logo. This is scrap yarn and a too-large leaf I had lying around. My hope is that smaller needles and thinner yarn will make it a reasonable size. I'll make an update post once I have it finalized, a decent picture taken, and a published pattern address to share.

Saturday, December 12, 2015

Basic Bulky Beanies and Cowls


On my post-Thanksgiving, Small Business Saturday visit to Stitch Space in Webb City, MO, I went in with the intention of buying something to help support Sasha's lovely yarn shop. I bought several things, but this is the first completed project from the haul.

I previously made scarves for both the daughter-in-law and the granddaughter with a total of three skeins of Plymouth Baby Alpaca Grande Hand Painted yarn. The pattern was Stephanie Pearl McPhee's One Row Scarf.

While I was at the yarn store, I called my sweet d-i-l and asked if they'd like hats to go with their scarves. I was given permission to knit some up, so I bought another three skeins of what I thought was the same colorway of the yarn. Here is a scarf.

Now, let's look at the hat:

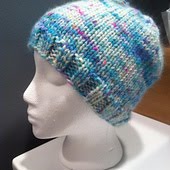
Yeah. Way off. I wanted them to have sets, so I used the leftovers to make each of them a cowl.


Fortunately, I purchased too much of this new yarn, so I made a simple, snug cowl for each of them from the remainder. I just cast on the same number of stitches I had used in each hat, did a 2x2 rib for 8 rounds and a body of stockinette, followed by another 8 rounds of 2x2.

I made each of the hats starting with a fresh skein, and each had leftovers. I was able to make a toddler cowl using the above recipe with them, and then I used the entire extra (3rd) skein for the adult cowl.

Trust me. I really, really did use the same yarn for both the hat and the cowl shown here. The hat is in my crazy bright bathroom, and the cowl is on the bed, with Nelea supervising.